
In the modern home, convenience and efficiency are at the forefront of innovation, particularly in home automation. One such innovation is the installation of motorized curtains, which not only add a touch of sophistication but also enhance the functionality of your living space. Whether you’re looking to automate your blackout curtains for a home theater experience or seeking the convenience of controlling sunlight in your living room with the touch of a button, this guide will walk you through the DIY installation process of motorized curtains.
Understanding Motorized Curtains
Before diving into the installation process, it’s crucial to understand what motorized curtains are and how they work. Motorized curtains Dubai, also known as automatic or electric curtains, are curtain systems that open and close using an electric motor. They can be controlled remotely, via a wall switch, or even integrated into smart home systems for automated scheduling and control.
Choosing the Right Motorized Curtains

Types of Motorized Curtains: There are various types of motorized curtain systems available, including those suitable for blackout curtains, sheer curtains, and traditional drapes. Choosing the right type depends on your specific needs, such as light control, privacy, or energy efficiency.
Measurement and Selection: Measure your windows accurately to ensure that the curtains cover the desired area effectively. Consider the weight of the fabric, especially for blackout curtains, as heavier drapes might require a stronger motor.
Installation Process
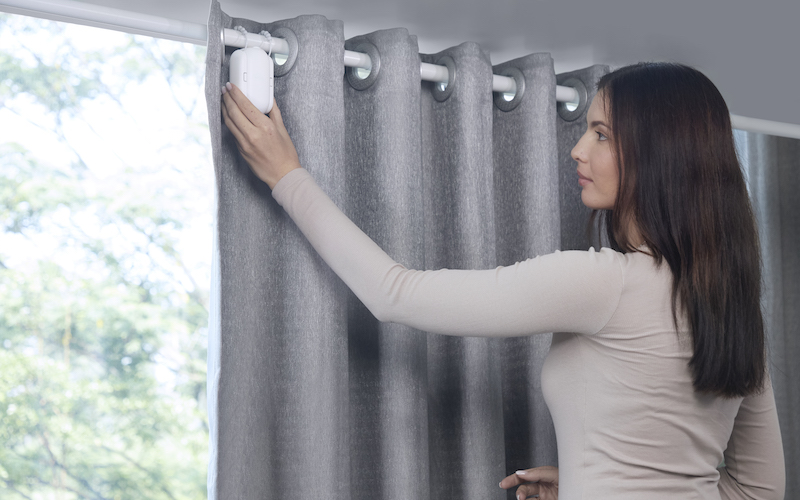
Gathering Tools and Materials: Before starting, gather all necessary tools and materials. You’ll need a measuring tape, drill, screwdriver, ladder, and the motorized curtain kit, which should include the motor, track, brackets, and remote control.
Measuring and Marking: Carefully measure the width of your window and determine the track length needed. Mark the points where the brackets will be installed, ensuring they are level and aligned with your window’s dimensions.
Mounting the Brackets: Drill holes at the marked points and secure the brackets using screws. Ensure the brackets are firmly attached to the wall or ceiling, depending on your installation preference.
Assembling the Track: If your track comes in pieces, assemble it according to the manufacturer’s instructions. Ensure the track is straight and the connections are secure.
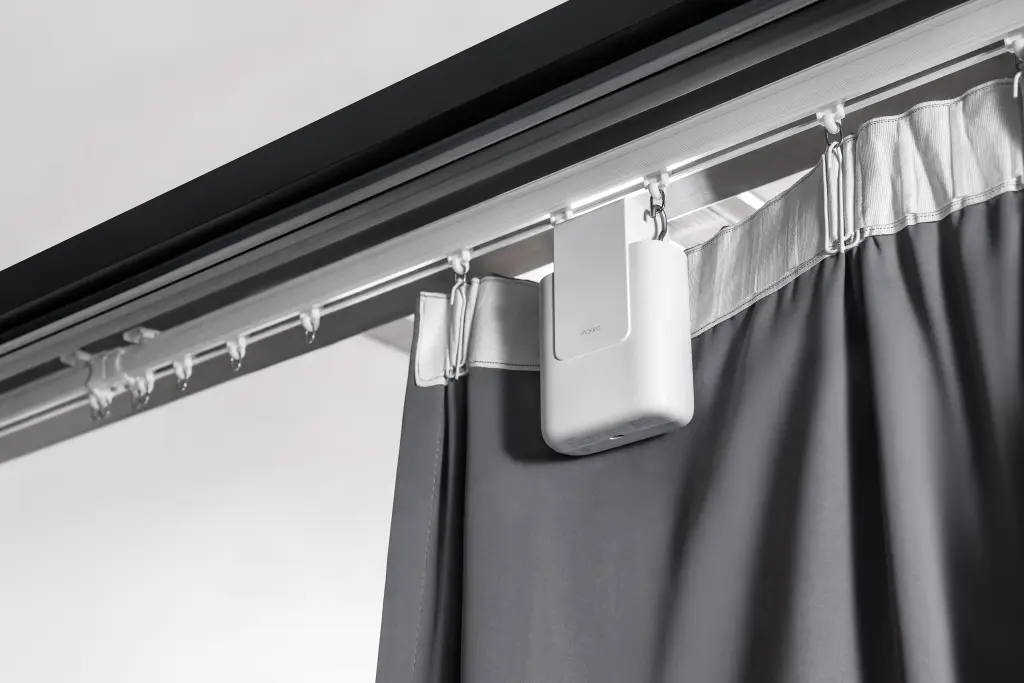
Installing the Track: With the brackets in place, mount the track onto the brackets. Make sure the track is securely fastened and level. Some systems may require additional steps to connect the motor to the track.
Hanging the Curtains: Once the track is installed, you can hang your curtains. If you’re installing blackout curtains, ensure they are correctly aligned to block out light effectively. The process may vary slightly depending on the type of curtains and hooks or carriers used.
Wiring and Power: Follow the manufacturer’s instructions for connecting the motor to a power source. Some motors are battery-operated, while others may require wiring to your home’s electrical system.
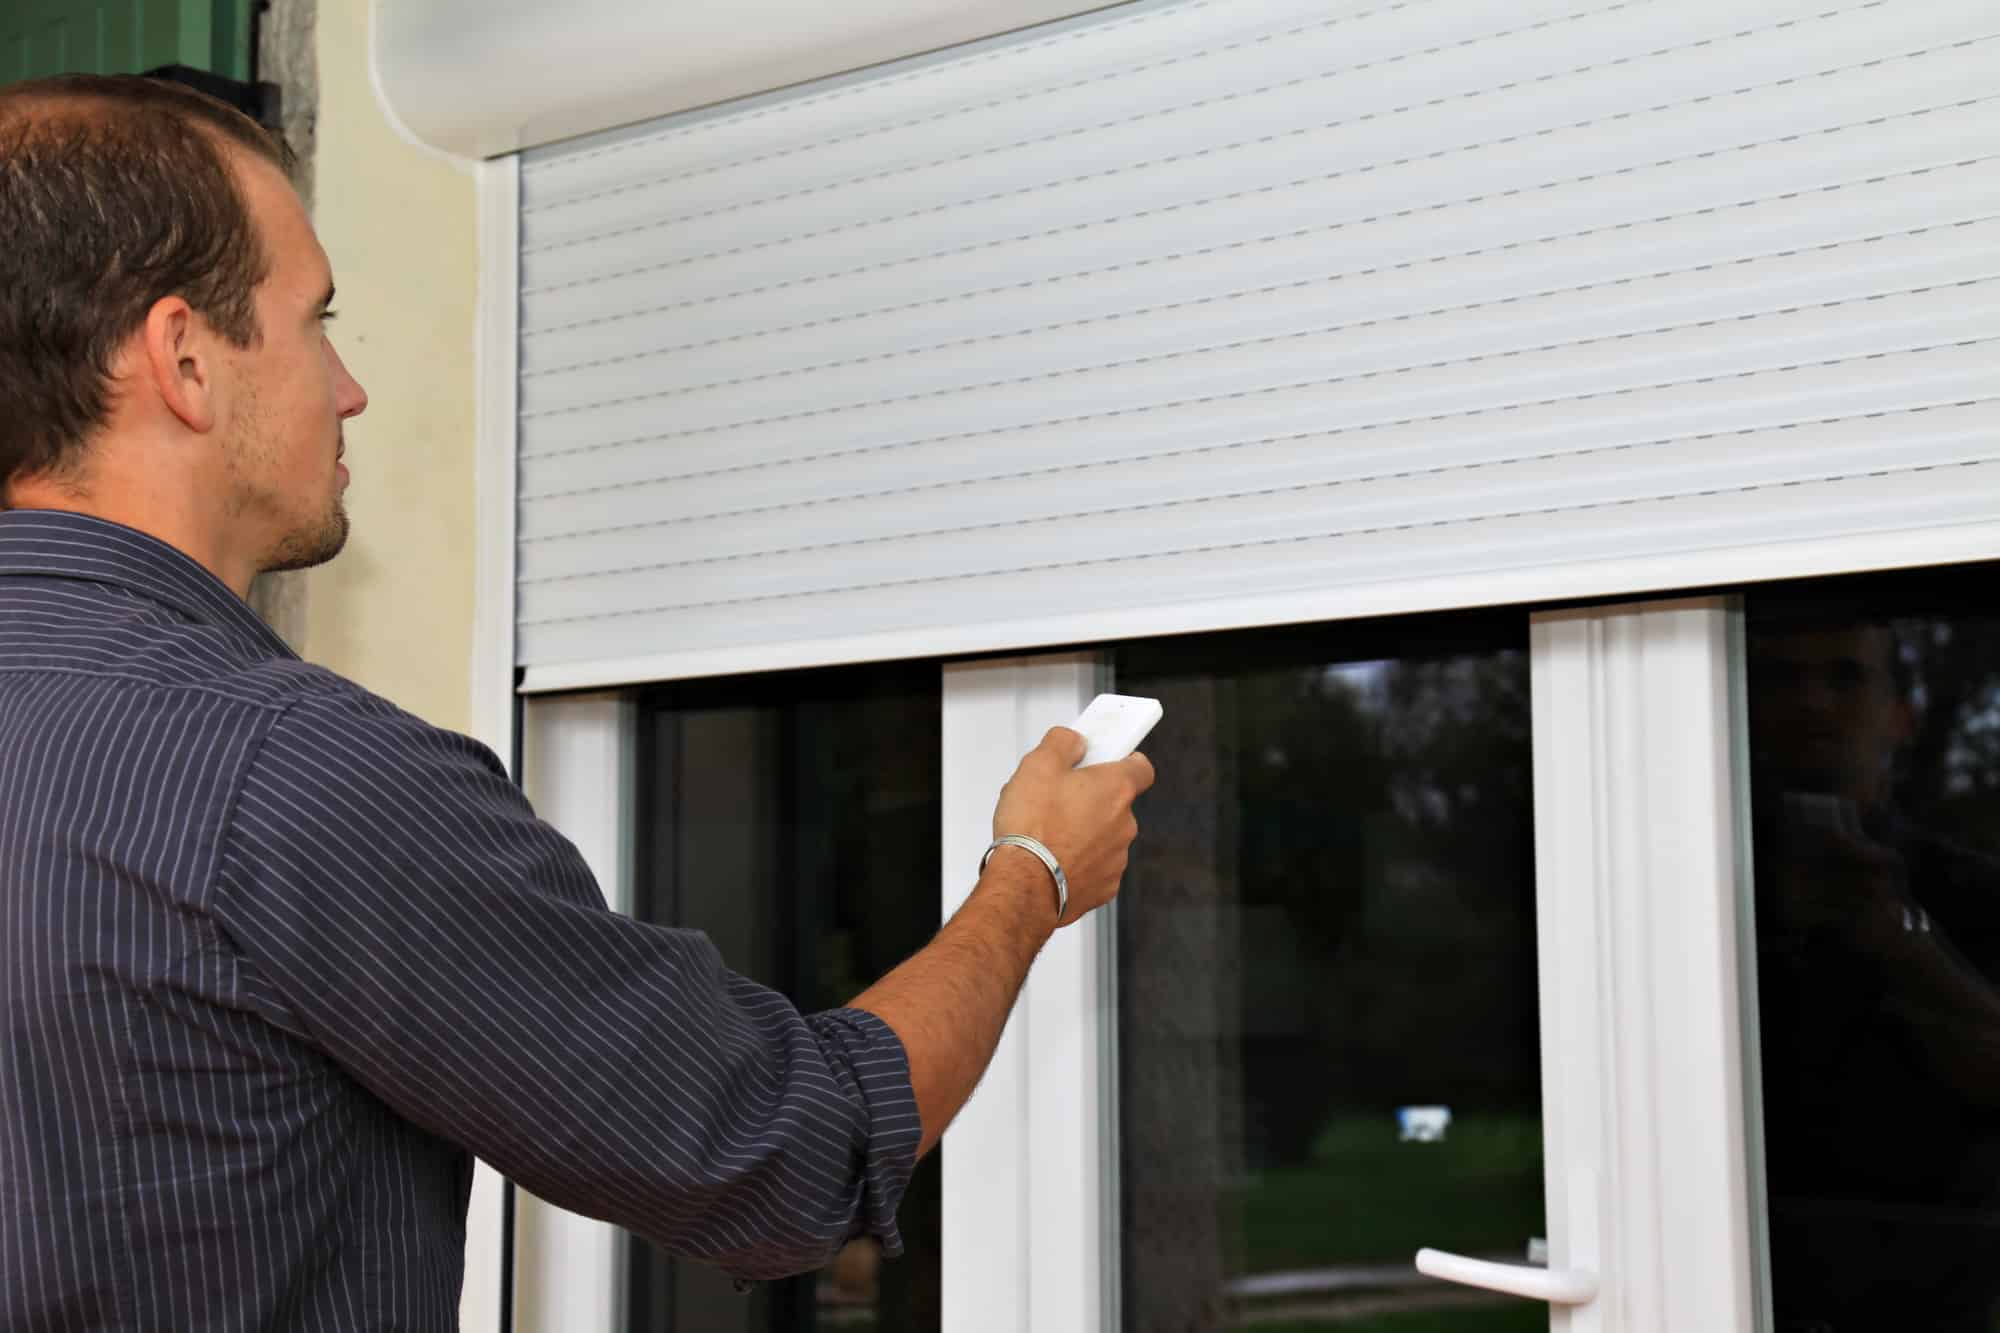
Programming and Testing: With everything installed, it’s time to program the remote control and test the system. Follow the instructions to set up open and close limits, and test the curtains to ensure they operate smoothly.
Integration with Smart Home Systems: If desired, integrate your motorized curtains with your home automation system. This might require additional steps or accessories, depending on your system.
Maintenance and Troubleshooting
Regular Maintenance: To ensure the longevity of your motorized curtains, perform regular maintenance. This includes cleaning the track, checking the batteries (if applicable), and ensuring the fabric of your curtains, especially blackout curtains, is clean and free of dust.
Troubleshooting: If you encounter issues, refer to the manufacturer’s troubleshooting guide. Common problems might include unresponsive motors, uneven curtain movement, or issues with remote control programming.
Conclusion
Installing motorized curtains is a straightforward process that can significantly enhance the convenience and aesthetic appeal of your home. By following this step-by-step guide, you can successfully install motorized systems for your curtains, including blackout curtains, transforming your living space with the touch of a button. Not only do these curtains offer ease of use, but they also contribute to energy efficiency and privacy. Embrace the future of home automation by integrating motorized curtains into your home.